Running InfluxDB & Chronograf on DigitalOcean VPS (обновлено: 02 Jun 2016, 13:56:02)
How to create own server with InfluxDB and Chronograf. 3 month for 5$
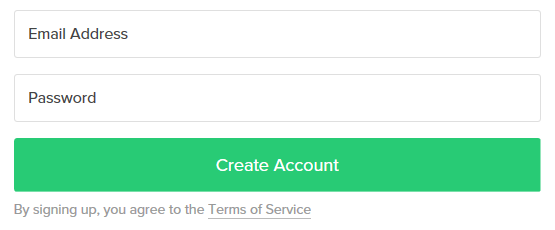
1. Go to DigitalOcean and Sign up for a Digital Ocean account for simply enter your email and password.
2. After registration, login your DigitalOcean account and confirm your email address.
3. Update your billing profile and deposit a $5 via paypal or credit card to your Digital Ocean account, the totally $15 is going to become available and it can be bought a 3 months vps cloud hosting.
4. Now you can create Droplet/Server, click Create Droplet button in the upper right hand corner of the page.

5. Select Debian and size 5$/mo, choose suitable region.
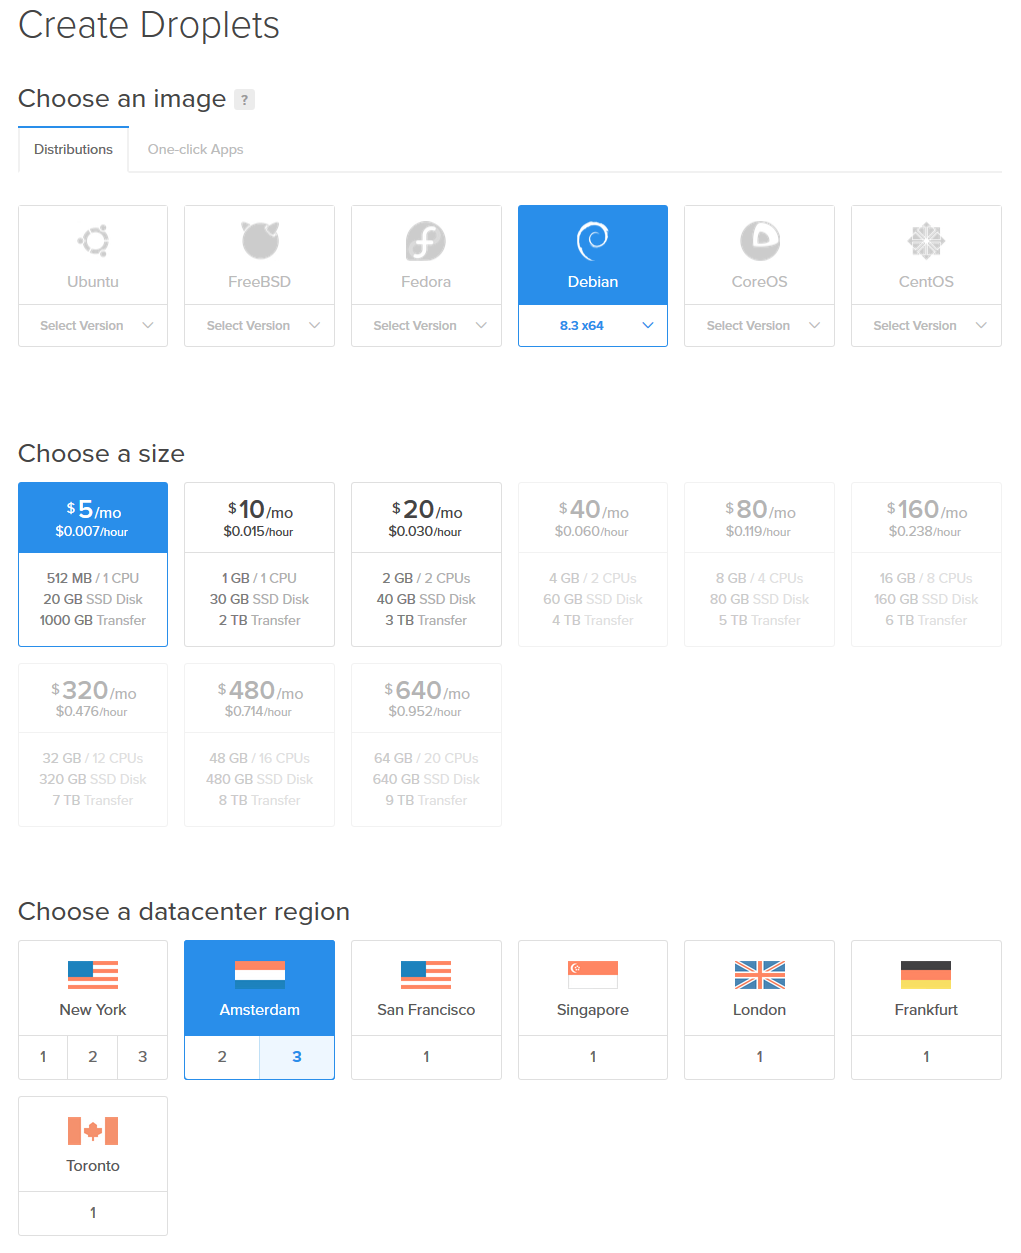
6. Finally click create.

7. After ~55 seconds our new clean VPS ready for use. IP Address/Username/Password will be sent to your email address. After that we need some SSH client (Windows users - PuTTY) for further steps.
8. Connect with SSH Client to the Server
login as: root
root@178.62.198.242's password: [PASSWORD FROM EMAIL MESSAGE]
You are required to change your password immediately (root enforced)

The programs included with the Debian GNU/Linux system are free software;
the exact distribution terms for each program are described in the
individual files in /usr/share/doc/*/copyright.

Debian GNU/Linux comes with ABSOLUTELY NO WARRANTY, to the extent
permitted by applicable law.
Last login: Tue Apr 26 11:12:43 2016 from 36-197-190-90.dyn.estpak.ee
Changing password for root.
(current) UNIX password: [PASSWORD FROM EMAIL MESSAGE]
Enter new UNIX password: [YOUR NEW STRONG PASSWORD]
Retype new UNIX password: [YOUR NEW STRONG PASSWORD]
root@debian-512mb-ams3-01:~#
9. Initial work done! Congratulations!
10. InfluxDB and Chronograf setup:
DigitalOcean (Debian 8 x86_64)!
root@debian-512mb-ams3-01:~# wget https://dl.influxdata.com/influxdb/releases/influxdb_0.12.2-1_amd64.deb
root@debian-512mb-ams3-01:~# wget https://s3.amazonaws.com/get.influxdb.org/chronograf/chronograf_0.12.0_amd64.deb
root@debian-512mb-ams3-01:~# dpkg -i influxdb_*_amd64.deb
root@debian-512mb-ams3-01:~# dpkg -i chronograf_*_amd64.deb
root@debian-512mb-ams3-01:~# nano /etc/influxdb/influxdb.conf
replace:
reporting-disabled = false
with:
reporting-disabled = true

replace:
[http]
  ...
  auth-enabled = false
with:
[http]
  ...
  auth-enabled = true

replace:
[[udp]]
  enabled = false
  # bind-address = ""
  # database = "udp"
with:
[[udp]]
  enabled = true
  bind-address = "0.0.0.0:55558"
  database = "mydb"

[Click Ctrl + O, Enter, Ctrl + X]

root@debian-512mb-ams3-01:~# service influxdb restart
root@debian-512mb-ams3-01:~# service influxdb status
● influxdb.service - InfluxDB is an open-source, distributed, time series database
   Loaded: loaded (/lib/systemd/system/influxdb.service; enabled)
   Active: active (running) since Thu 2016-04-28 10:20:04 EDT; 3s ago
     Docs: https://docs.influxdata.com/influxdb/
 Main PID: 754 (sh)
   CGroup: /system.slice/influxdb.service
           ├─754 /bin/sh -c /usr/bin/influxd -config /etc/influxdb/influxdb.conf  >>/dev/null 2>>/var/log/influxdb/influxd.log
           └─755 /usr/bin/influxd -config /etc/influxdb/influxdb.conf

root@debian-512mb-ams3-01:~# influx
Visit https://enterprise.influxdata.com to register for updates, InfluxDB server management, and monitoring.
Connected to http://localhost:8086 version 0.12.2
InfluxDB shell 0.12.2
> CREATE USER "[admin username]" WITH PASSWORD '[admin password]' WITH ALL PRIVILEGES
> auth [admin username] [admin password]
> CREATE DATABASE mydb
> CREATE RETENTION POLICY mydb_3_days ON mydb DURATION 3d REPLICATION 1 DEFAULT
> exit

root@debian-512mb-ams3-01:~# nano /opt/chronograf/config.toml
replace:
Bind = "127.0.0.1:10000"
with:
Bind = "0.0.0.0:10000"

root@debian-512mb-ams3-01:~# service chronograf restart
11. InfluxDB and Chronograf setup ready. Open Chronograf page in web browser http://[server ip address]:10000/
Click Add new server
Nickname: [server name]
HTTP BASIC AUTH USERNAME (OPTIONAL): [admin username]
HTTP BASIC AUTH PASSWORD: [admin password]
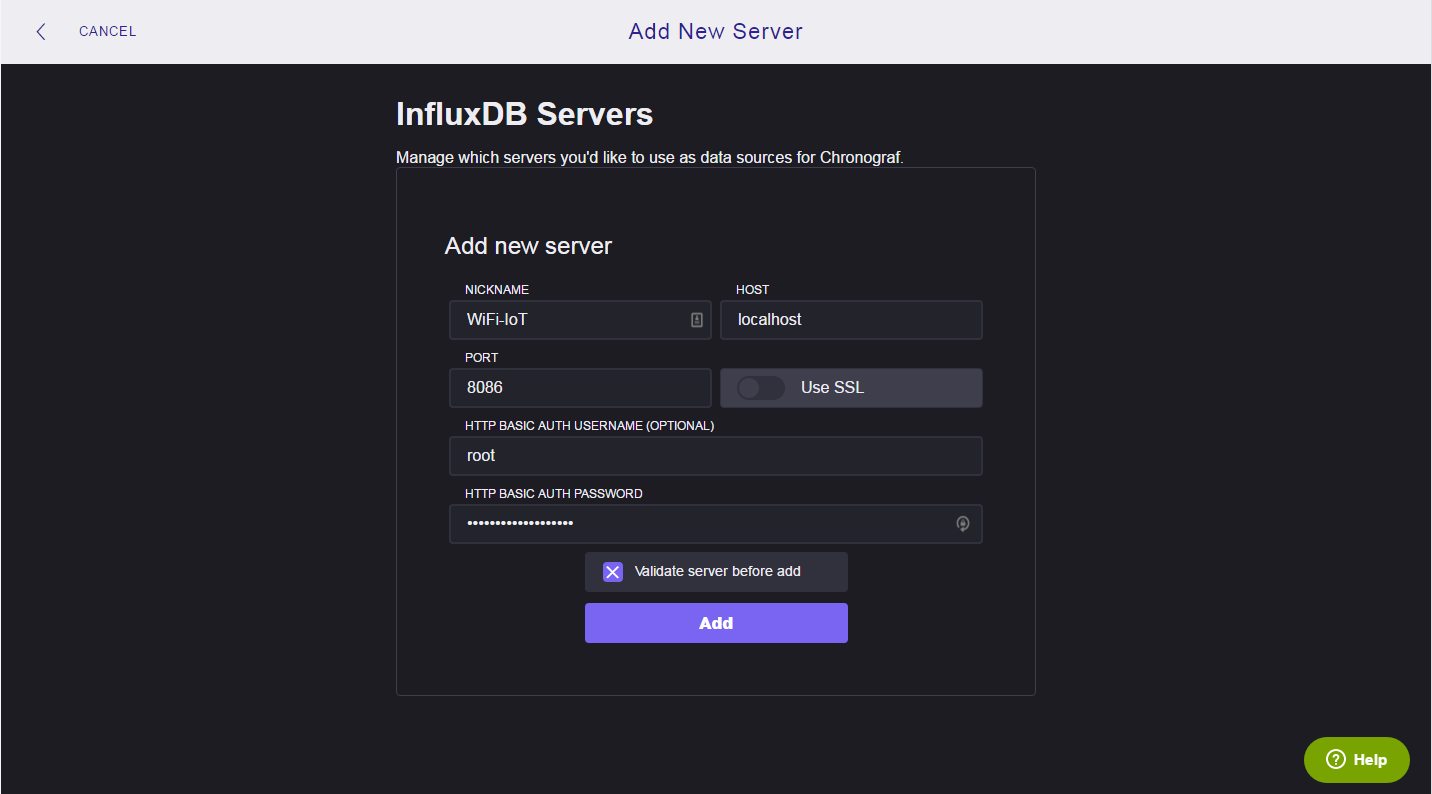
Click Add
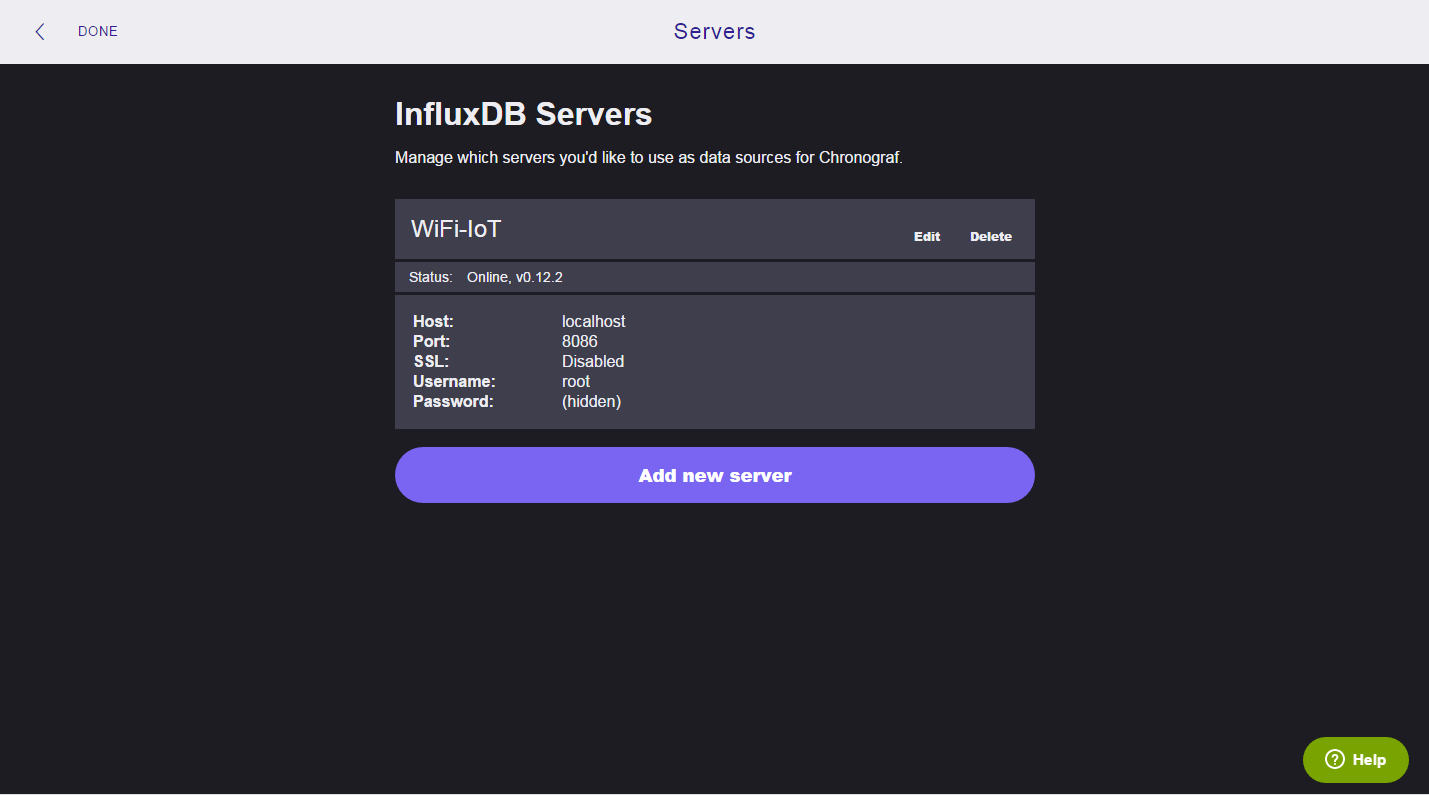
Click Done, left upper corner. Now we need to adjust module settings, to start sending data to InfluxDB we will use TCP/UDP Client feature from firmware builder.
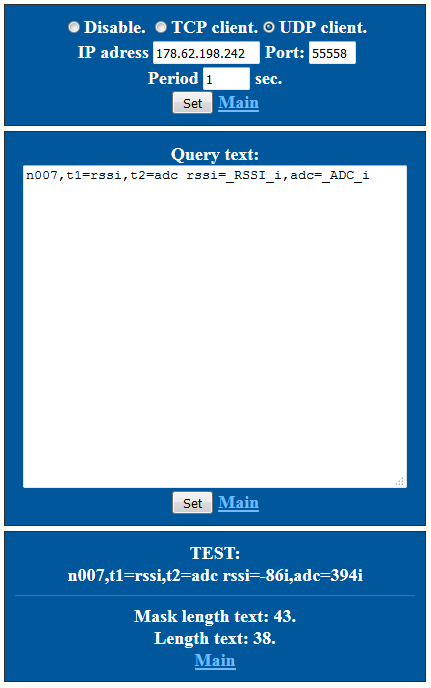
Go to http://[module ip address]/configtcp and enable UDP Client. Then put right IP Address, Port and Period. Then using macroses from TCP/UDP Client wiki page create some query for InfluxDB, in our setup we will use line protocol.
For example i used Witty Cloud ESP8266 board with enabled Internal ADC, TCP/UDP client - features. Query text: n007,t1=rssi,t2=adc rssi=_RSSI_i,adc=_ADC_i
After setup is done we can start creating visualization in Chronograf http://[server ip address]:10000/, click big plus sign and create new graph.

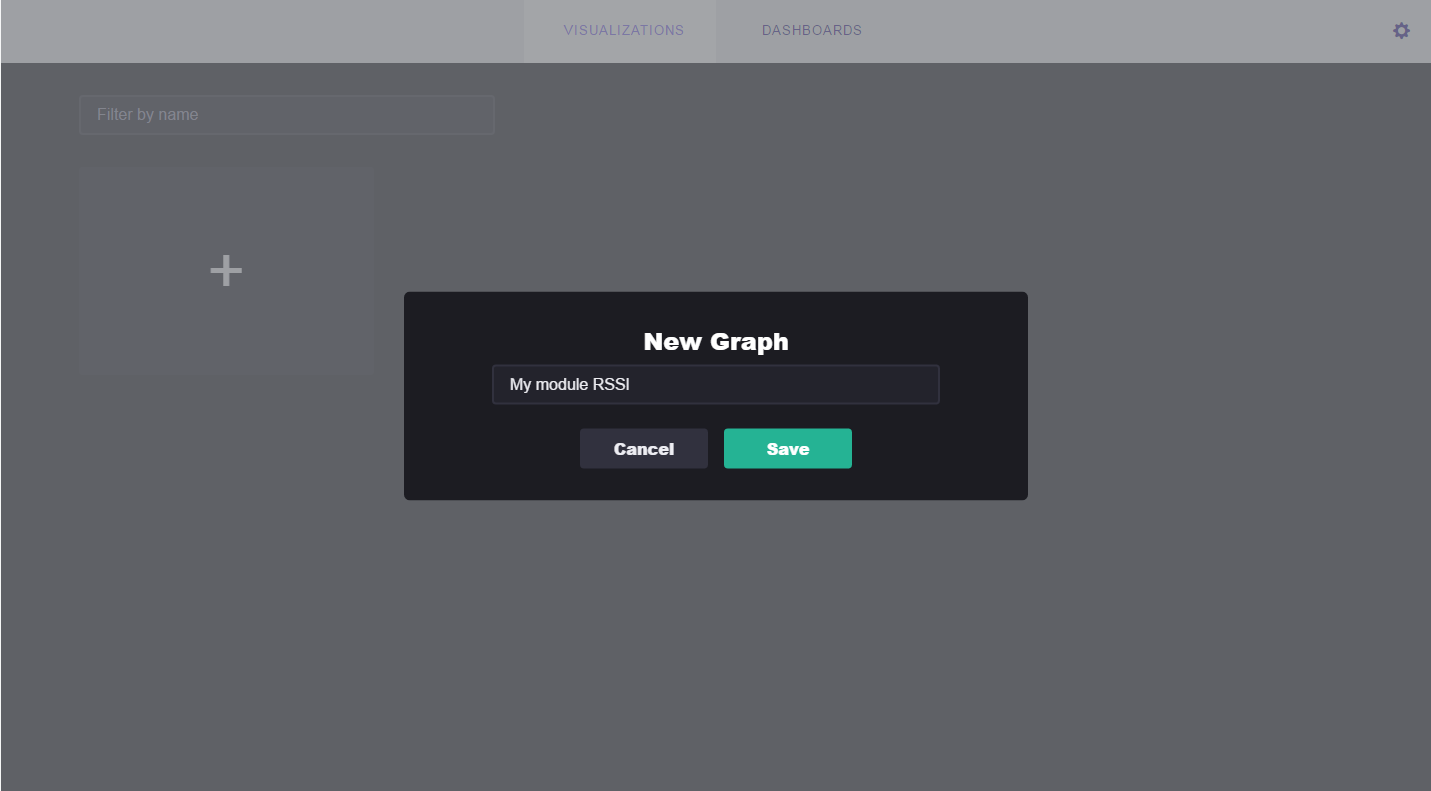
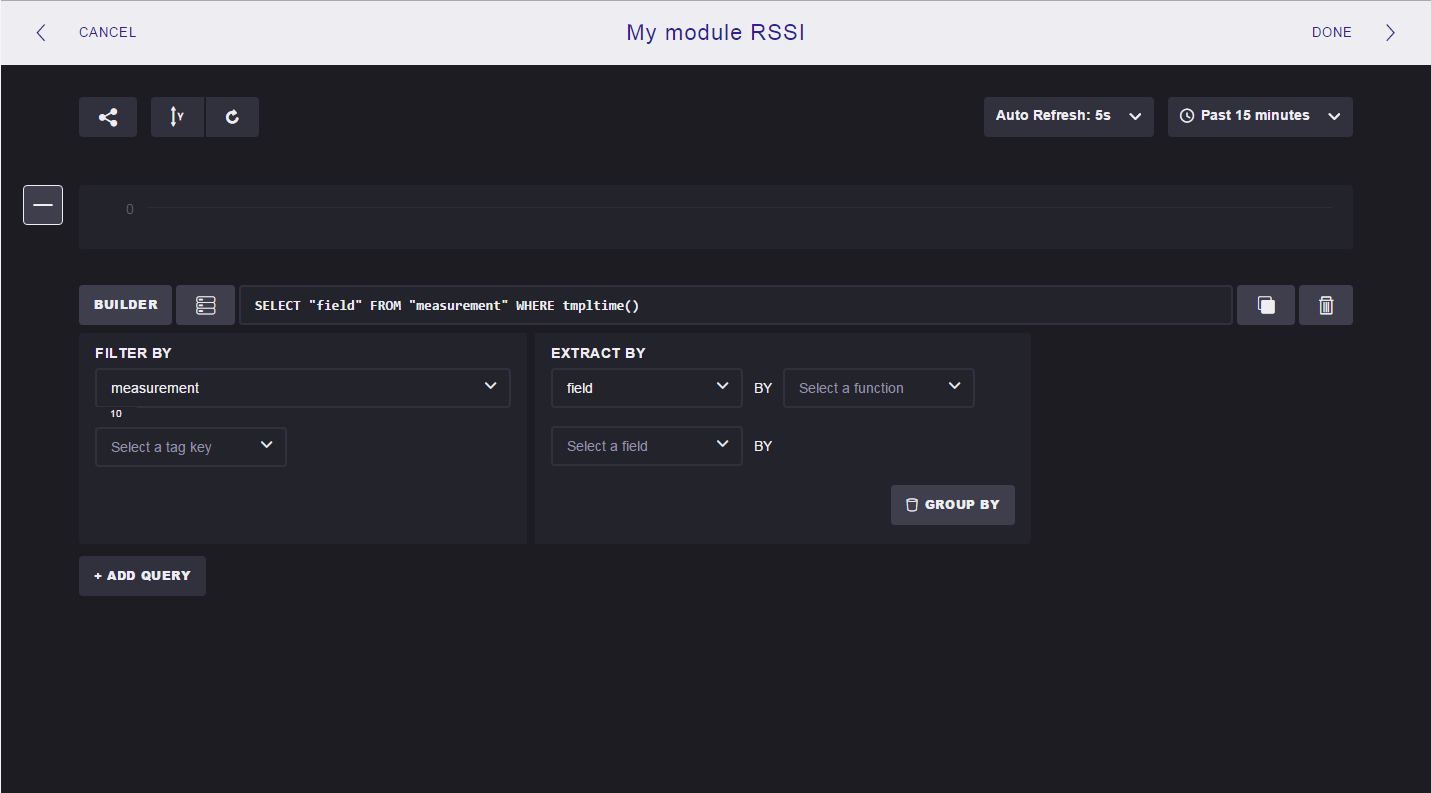
After clicking Save button it will open Query builder view.
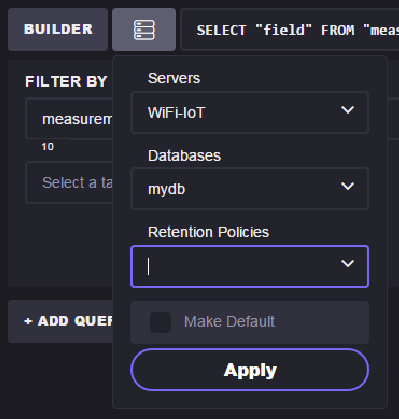
Click this icon:

Select our "mydb" database and click Apply.
Under measurements you will find your module name n007 if example query for InfluxDB was used. Select this measurement and then on the right side under "Extract By" select RSSI or ADC option.
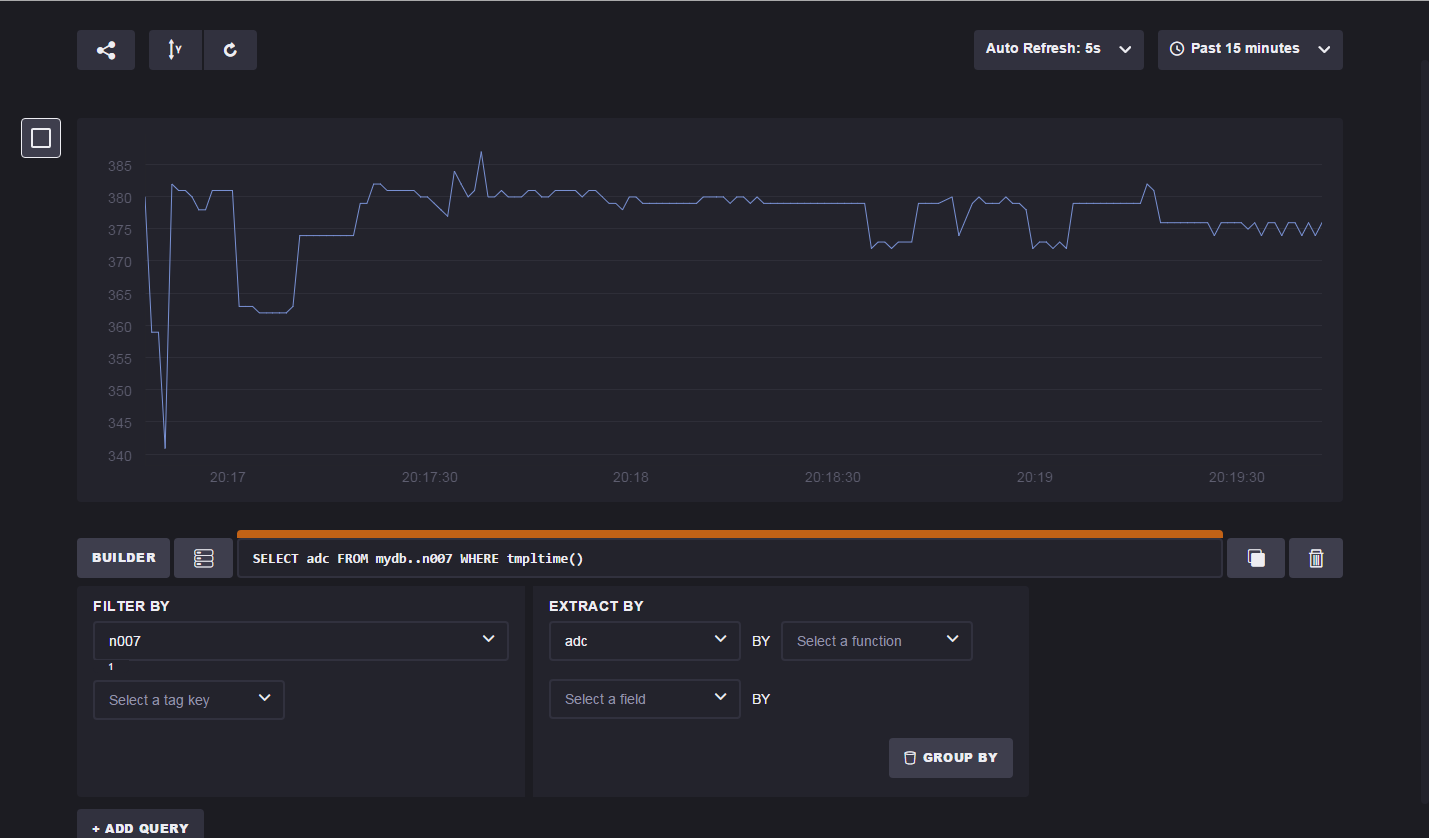
In the right upper corner it is possible to select lower Auto refresh time and period for values.
